Friday 2 March 2012

Chassis & plates


The chassis & front axle have now both been taken back to bare metal, painted into bonda & finally into black.


Below are the gusset plates that hold the pillars to the cross bearers. They were slightly beyond saving due to rust and years of having holes added & elongated?! I suspect this will mean other work in other areas only time will tell. In the meantime new plates have been made & duly primed.


Sunday 22 January 2012

Update time!


As you can see from the picture above although the blog has been a little idell, work on the vehicle has not.
The panel repair work on the corner piece has been completed with new sections welded into place & then painted in bonda primer. The whole front has now been bolted together with the radiator, which is linked together with an aluminium corner section surround. This also required some welding work, before polishing & fitting to the vehicle. The headlights were sent away for fettling & re-chroming. When they returned they were reassembled and after polishing the radiator were mounted in position


The horn was completely dismantled, shotblasted and painted into bonda primer, after which the various bits received many coats of black before reassembly, testing & final fitting to the newly painted front bulkhead. Sitting next to the horn is the new Autovac tank of the correct type & now mounted back in it's original position on the bulkhead under the bonnet. The tank was copied from an identical one from another Gilford 168SD. Once made it has been duly fitted along with some original straps that were sourced, after painting. The actual autovac mechanism was in very good order and was just swapped into the new tank.The Gruss air springs were completely stripped of all the old paint and all assessable items were thoroughly cleaned and then they were duly put into Bonda. Once the front axle is back on with the weight of the vehicle they will be tested for holding air, so until that time they have been fitted up in position.


The steering column has been painted and fitted, along with the steering wheel that needed much repair work. One of the spokes was split right through, this was welded up and then the celluloid covering that was generally very good but unfortunately split in a handful of places was repaired
Finally all the pedals have now been connected up, so the clutch, throttle and brakes all now operate.

Saturday 30 July 2011

Rebuilding the Cab

The removed cab floor was shotblasted.


The front of the floor was torn & bent accentuating the cab drop, as seen in picture below. This was straightened & welded up and put into primer.


The floor was fitted up, along with the other sections of the floor & the engine sidewall to get an idea of fit.


The front cab corner panel was also shotblasted, showing the true extent to the rotten metal.


This was put into primer & offered up. The repaired split in the floor was now keeping everything level, so that when the corner panel was fitted up, it now sits square. This in turn allowed us to ascertain the correct height of the radiator, as in the past due to the sagging cab the radiator packings had been changed for a much thinner material, thus allowing the radiator to sit lower. The correct thickness was now able to be determined and new rubber packings have subsequently been made and fitted.


In the picture above you can get an idea of the repair in the front of the floor and where the corner panel has had some of its rot cut out in readyness for a new piece to be let in. Below is a picture of it all coming together and an inside view of the repair work that needs to be done to the front of the corner panel and floor on the wheelarch.


Saturday 12 February 2011

Engine back in the saddle

First the chassis was filled with weld where the front panel of the cab had rubbed a V groove across the chassis rail due to a slight collapsing.
A coat of primer was applied to all the areas that had been stripped of paint.

The chassis was painted black and the engine was given a fresh coat of grey. The engine with gearbox attached was then duly fitted back into the frame after approx 20years apart.


Friday 21 January 2011

Off with the Cab!

The rest of the cab has now been carefully dismantled so that the metal panels and inner wheelarch can have the rot cut out & new pieces welded in.


The remaining cab came off in one piece, leaving it all looking a little naked.

The old paint has been removed from the firewall and ext of the chassis frame at the front in preparation for some primer.


Saturday 8 January 2011

Steering in the Right Direction

The steering box has now been stripped down and assessed.

On the whole the box was in very good order, except for a small area of damage to the worm wheel just off centre driving position. We were able to rectify this damage and thus solve the tight spot in the steering, allowing the box to be reassembled & then have it's first coat of paint.


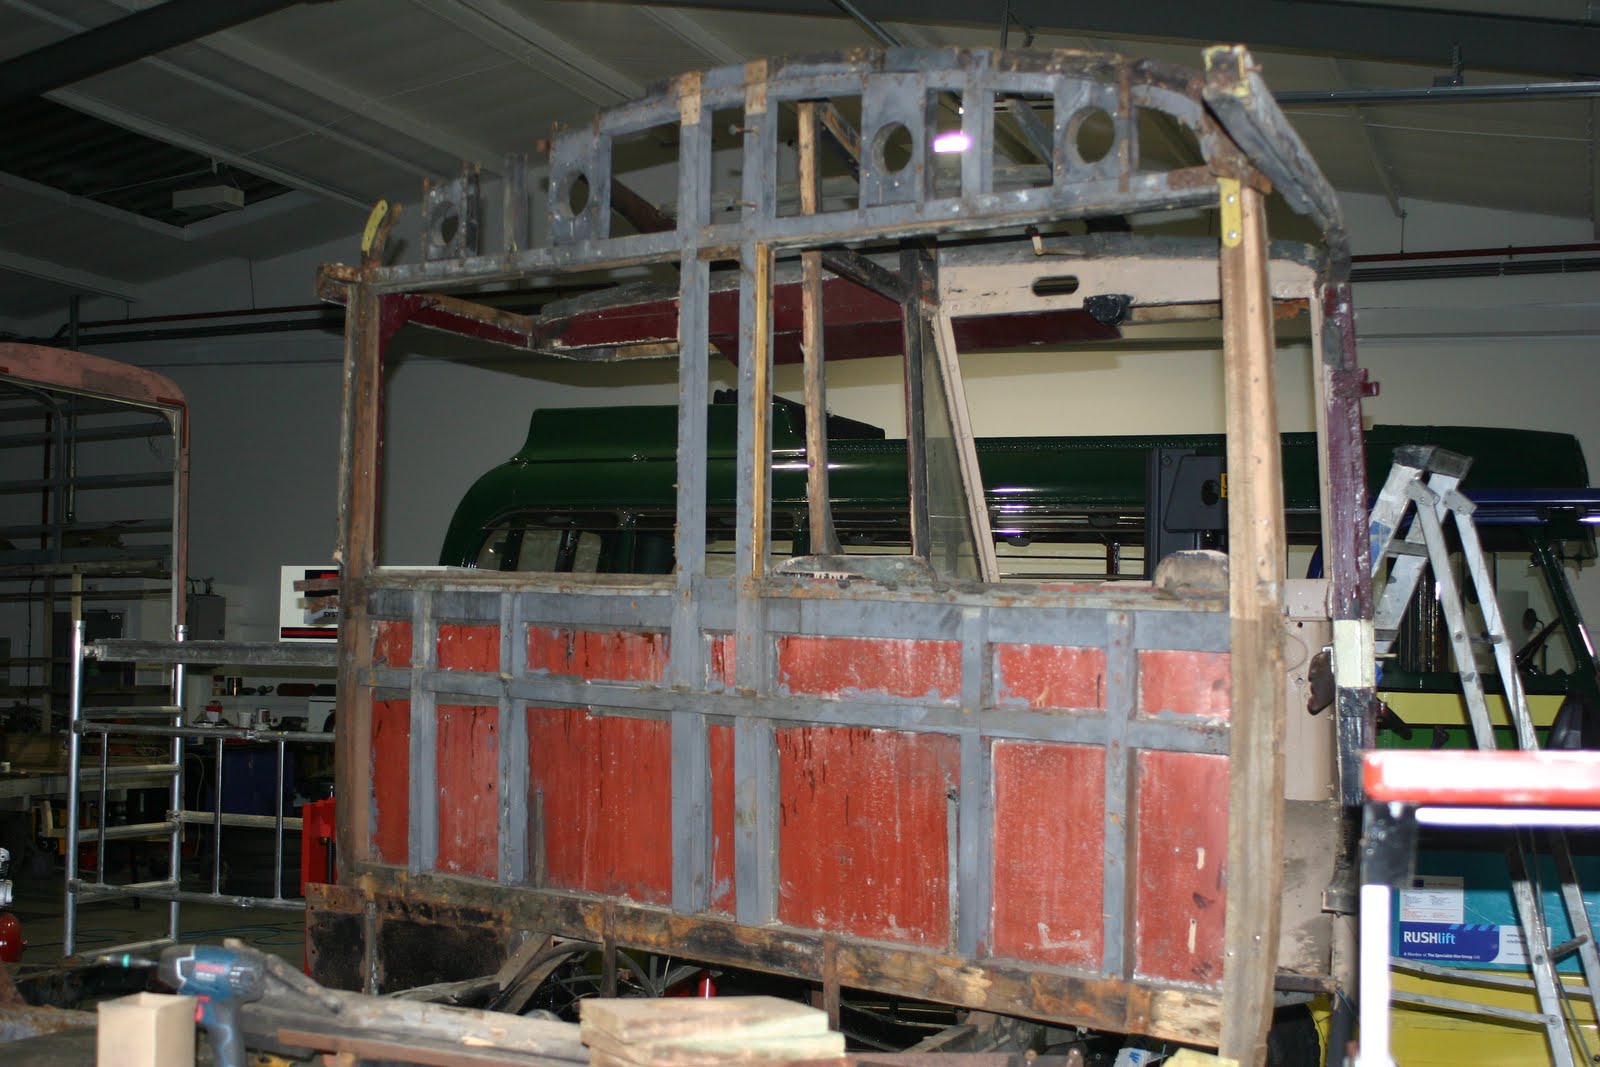
More dismantling has also gone on with the removal of the saloon bulkhead framework.


The above photo shows the Saloon bulkhead parting company with the chassis firewall. Luckily the bulkhead came out in one piece although the notorious twist in the bulkhead that the coach has always had in it's preservation life is now easy to understand. The bulkhead has been repaired in situ at some point in it's early life and unfortunately, the repair work was not done in keeping with the Weymann principal or with the understanding of keeping the frame square.


The cab is now supported solely by the firewall as can be seen in the above photo.


Sunday 5 December 2010

New Metalwork

All the new metalwork that holds the body timber framework together is now finally complete & painted.

The flitchplates for the roof hoops above were remade from the only complete original one left. Others had been made at some point in the past to the wrong profiles and fitted to the outside of the hoops as opposed to internally within the middle of the timber.
Below are pictures of some of the main body plates.